Groovymagnets Magnetic Sticker Gold
Magnetic sticker gold

MAGNETIC STICKER GOLD
Let it sparkle! The Golden Age magnetic sticker provides a sparkling touch in a cozy and warm interior. The sticker, based on old textile tapestries, combines perfectly with white, wood, rattan or other natural materials.
Even in a warm, dark interior, the golden magnetic sticker creates a tactile, luxurious & glamorous touch Fill your wall with a Golden Spark and personal item.

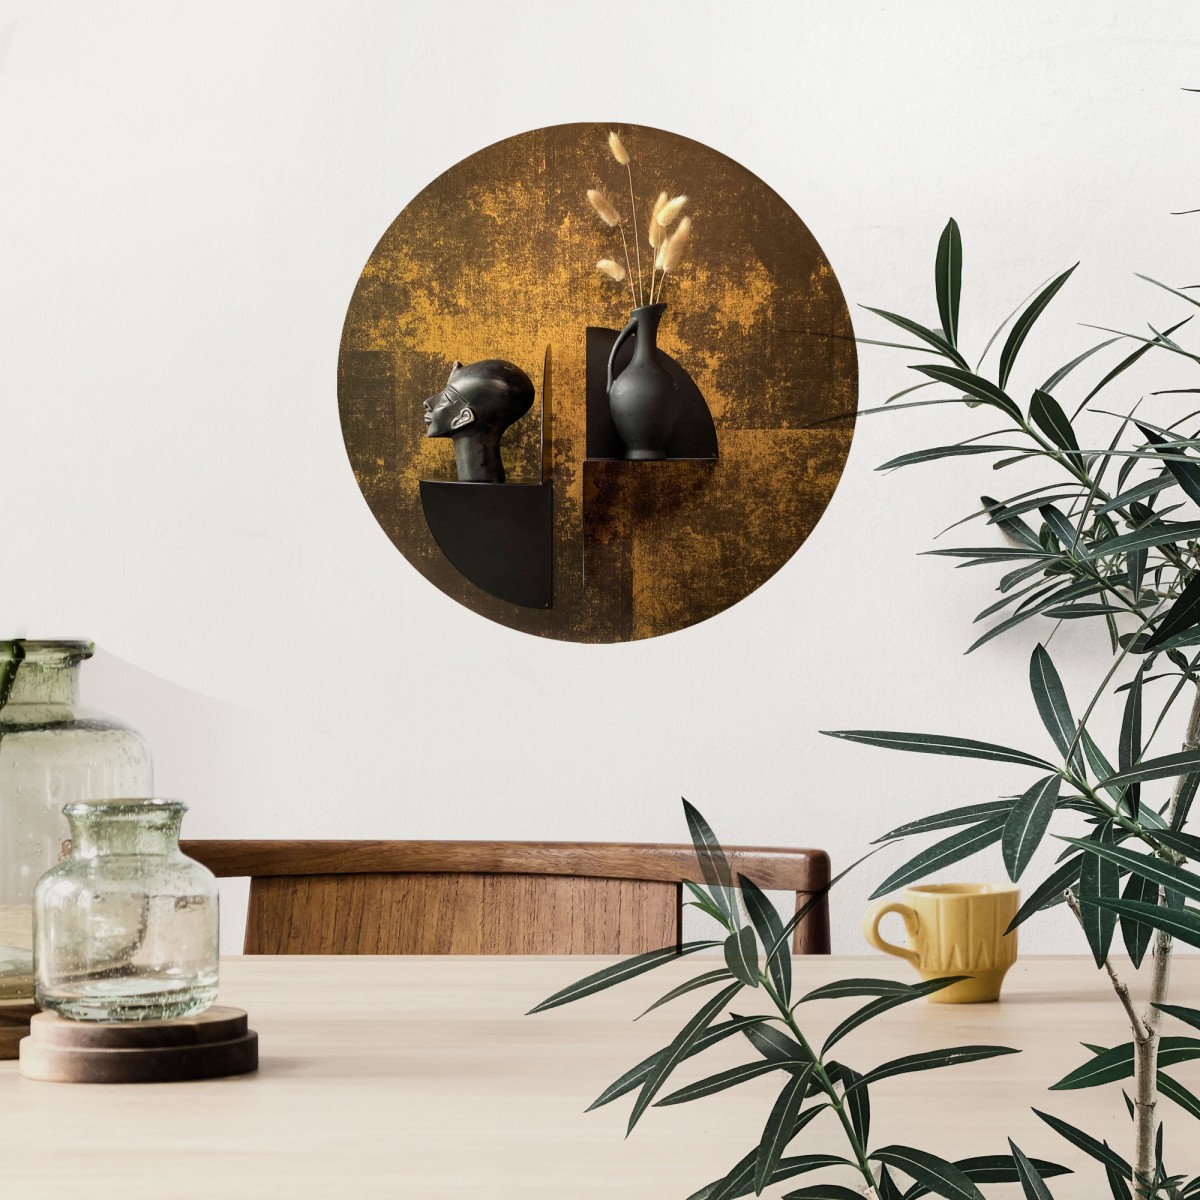

A wooden shelf instantly adds "cachet" to a cozy room. Also choose from other functional magnetic toppings such as a magnetic lamp, the wall modules, flower vases or photo shelves.
INFORMATION
QUALITY
Premium quality
COLOUR
Fabric Gold Print
DIAMETER
60 cm
SET
Including magnet set
MATERIAL
- Metal
- Wood
- Glass Cardboard
- Paper
- Plastic
PRODUCT TYPE
Magnetic sticker
PRODUCTION
Made In Europe

DOWNLOADS
↓ Instructions & Maintenance
DESIGN
100% Belgian design
CLEAN
Degrease the surface with lukewarm water and cleaning vinegar. Rinse again with lukewarm water. Do not use ammonia when cleaning because it can affect the adhesive of the sticker.
SUITABLE
- Walls
- Ddoors
- Cupboards
FLAT / SMOOTH
Groovy Magnets magnetic stickers adhere to almost any smooth surface such as: metal, wood, glass, cardboard, paper, plastic, kitchen cupboards, smooth painted walls and doors. If necessary, smooth and sand down any bumps. Small bumps or unevenness in the surface can remain visible through the sticker after applying.


CARE & USAGE
- All our stickers are water-resistant. Clean with a damp cloth and a drop of washing-up liquid. - Remove stubborn streaks with a magic eraser (melamine sponge) and a drop of washing-up liquid
MAINTENANCE
Apply to a smooth, degreased surface using a hair dryer (see instructions and maintenance)
APPLICATIONS
AVOID AIR TUNNELS
Stick the sticker on the wall within 2 hours after removing it from the packaging. When a rolled-up sticker is opened, air tunnels may occur in the backing sheet which can dry out the adhesive layer.
REMOVE THE STICKER
Warm the sticker with a hairdryer and carefully peel it off bit by bit. Always keep heating every piece well.
STICK IT ON
First remove part of the top of the backing sheet from the sticker. Position the sticker on the surface and press firmly. Now gently pull the back sheet further downwards and work your way to the bottom. Meanwhile, rub the sticker firmly with a soft cloth or a (soft) pressure roller.
TIP
In the rare case that the sticker would not adhere well to the substrate, we recommend supplementing with ready-to-use wallpaper adhesive
QUALITY
Depending on the substrate or the quality of the painted surface, it will be easier to remove the sticker. The longer the sticker is on a substrate, the more firmly it sticks. For a smooth painted surface removing will be easier than for a wallpapered wall.
APPLY THE STICKER
To ensure that the glue sticks properly to the wall, a hair dryer comes into play. Heat the front and the edges of the sticker with a hair dryer and press firmly. The heat makes the glue supple and gives optimum adhesion.